Now that you have installed BinConverter (along with any necessary Python modules), we can discuss how to use the BinConverter Graphical User Interface (GUI) to convert any .bin files to the Tint file format.
User Guide
- Launch BinConverter: As discussed previously, you can now launch the BinConverter GUI by performing the following command in the Command Prompt / Terminal:
python -m BinConverterIf download properly, the BinConverter GUI's Main Window should appear, an example is shown in the image below.
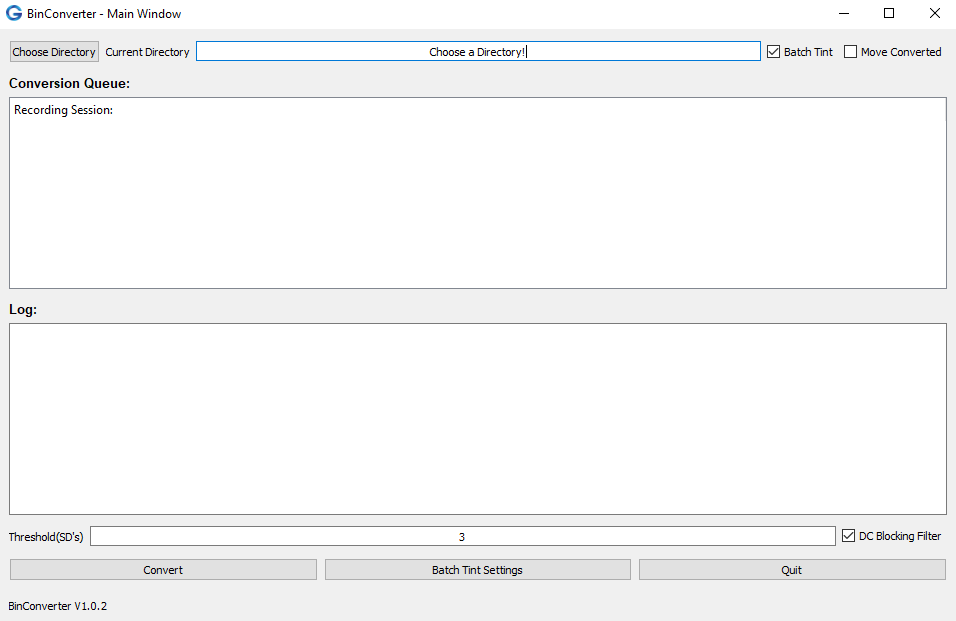
Fig 1. BinConverter GUI's Main Window
- Choose a Directory: Now you must choose a directory to analyze. BinConverter will analyze the .bin files within the sub-directories of your chosen directory. See the example blow:
/Chosen_Directory /SubDirectory1 *SD1_Session1Files *SD1_Session2Files /SubDirectory2 *SD2_Session3Files *SD2_Session4Files /SubDirectory3 *SD3_Session1Files ChosenDirectory_Session5FilesIn the example above, the chosen directory (Chosen_Directory) contains 3 sub-directories (SubDirectory1, SubDirectory2, and SubDirectory3), as well as one session directly within the chosen directory (ChosenDirectory_Session5Files). The session files with the asterisks (*) next to them will be analyzed. Leaving the session directly within the chosen directory (ChosenDirectory_Session5Files), not to be analyzed. This process could be changed in the future if needed. When designing the GUI this seemed to be the best for our lab.
- When you have chosen an appropriate file, the Conversion Queue should be populated with a list of sub-directories and their respective .bin files that need analyzing, depicted in the example image below. Note: if the Conversion Queue has not been populated, it is likely that all the .bin files have been analyzed, or that you are missing one of the files (you need the .set file as well for the analysis).
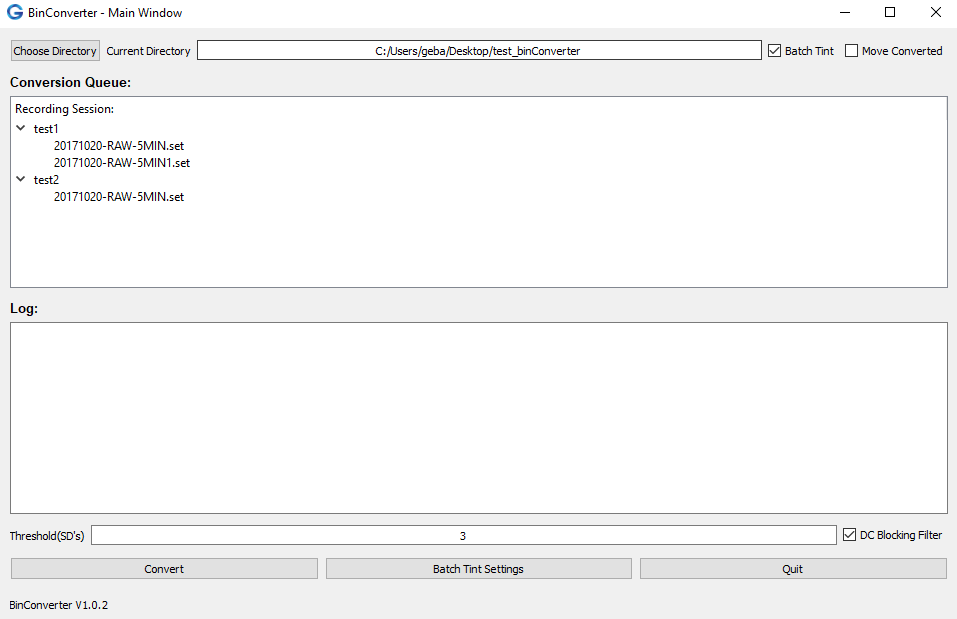
Fig 2. Visual representation of a properly chosen directory. In this case the test_binConverter directory contains two sub-directories, test1 which contains two sessions, and test2 which contains one session.
- When you have chosen an appropriate file, the Conversion Queue should be populated with a list of sub-directories and their respective .bin files that need analyzing, depicted in the example image below. Note: if the Conversion Queue has not been populated, it is likely that all the .bin files have been analyzed, or that you are missing one of the files (you need the .set file as well for the analysis).
- Choose Threshold: Next we will determine our threshold, which exists in a text-field towards the bottom of BinConverter's Main Window, highlighted by a red box in the image below.

Fig 3. Highlighting the location of the Threshold field that the user will be providing, defaulted to the value of 3.
Right now, each channel will have it's own threshold calculated based upon Quiroga et al1. In the referenced Quiroga paper, they measure the standard deviation of the background noise with the following equation:σn = median{|x|/0.6745}, where |x| is the band-passed signal, and σn represents the estimate for the standard deviation of the background noise. They then set a threshold forZ*σn. The Z value is the value that you are choosing, the GUI will default the value to 3. Note: in Quiroga et al paper they use a value of 4. - DC Blocking Filter: at the time this page is published the DC Blocking is either bugged in Tint or already performed on the .bin data. I will assume the latter due to the .set file saying
default_filtdcblock_hp 1. I do have code for an example DC Blocking filter, however I have not tested it. During my tests, I converted from .bin to Tint using the threshold within the .set file, and then compared it to the output with the dacqUSB converter. The outputs were extremely similar without the DC Blocking filter code that I think it is best to just leave it out. So right now if you check/uncheck the DC Blocking checkbox in the GUI, it does not actually change anything in terms of the conversion. I can uncomment the code to allow for DC Blocking based upon the user input, however I think it's best to just leave it as it is. - Choose to Move Files after Conversion: there is a check box located all the way to the right of the Current Directory text-field that says "Move Converted". When checked, after the BinConverter has finished converting the data, it will move all the analyzed data into a sub-directory named "Converted". I used to employ this technique just to separated the converted from the non-converted data. However, I just leave it unchecked for now.
- Choose to BatchTintV3 (or Not): there is a check box located directly to the right of the Current Directory text-field that says "Batch-Tint". When checked, after the data has been converted to the Tint format it will use BatchTINTV32 to perform KlustaKwik on the newly converted data.
- Check BatchTINTV3 Settings (optional): if you are going to check the Batch-Tint checkbox, you will want to ensure that you are clustering the cells with the correct settings. Towards the bottom of the BinConverter's Main Window you will see a button that says "Batch Tint Settings". When pressed you will see a "BatchTINT - Settings Window" (shown below). This is where you can navigate all your cluster settings that Tint provides you for KlustaKwik. More details about these settings are discussed in the BatchTINTV3 User Guide3.
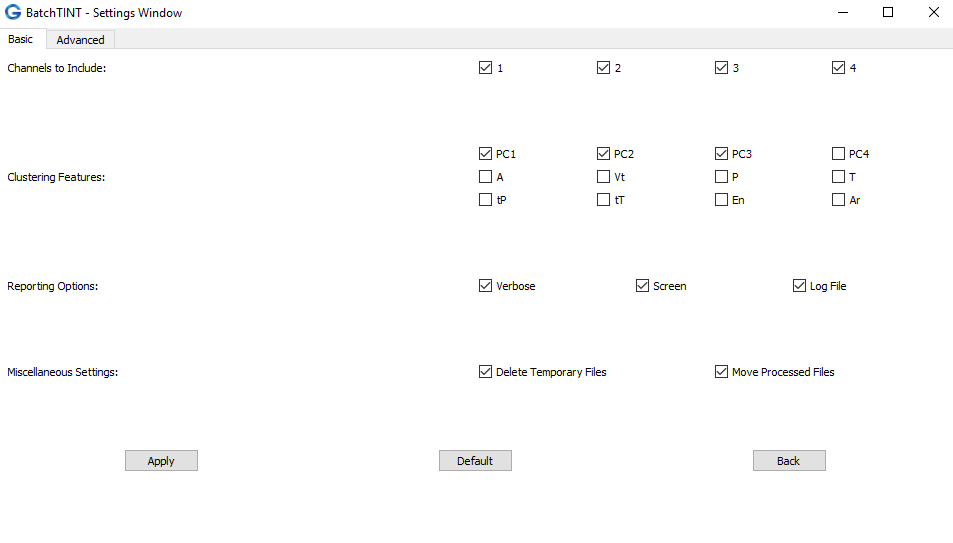
Fig 4. The BatchTINT - Settings Window will pop-up after the "Batch Tint Settings" button has been pressed. Note that there is a basic and advanced tab containing all the settings that Tint allows you to provide for KlustaKwik.
- Convert: Now that all the settings have been chosen, you can feel free to convert by pressing the Convert button in the bottom left hand side of the Main Window! As the sub-directories are analyzed, they will gradually be removed from the Conversion Queue.
References
- Quian Quiroga, R., Nadasdy, Z. & Ben-Shaul, Y. Unsupervised spike detection and sorting with wavelets and super-paramagnetic clustering. Neural Comput. 16, 1661–1687 (2004)
- BatchTINTV3 Project: https://geba.technology/project/batchtintv3
- BatchTINTV3 User GUide: https://geba.technology/project/batchtintv3-user-guide